Appendix A — System Access and HPC Login
This appendix provides reference instructions for accessing the Hercules HPC system from macOS and Windows, including optional X11 forwarding for GUI applications. These steps support all CADRE Year‑2 training workflows.
A.1 Login from macOS
Open the Terminal application.
Connect to the Hercules login node using SSH:
ssh -X <username>@hercules-login.hpc.msstate.edu
The
-Xoption enables X11 forwarding.(Optional) Install XQuartz for GUI/X11 applications:
After installation, log out and log back in to activate X11.
A.2 Login from Windows (PuTTY)
Install and open PuTTY.
Enter the hostname:
hercules-login.hpc.msstate.edu(Optional) Enable X11 forwarding:
Connection → SSH → X11 → “Enable X11 forwarding”
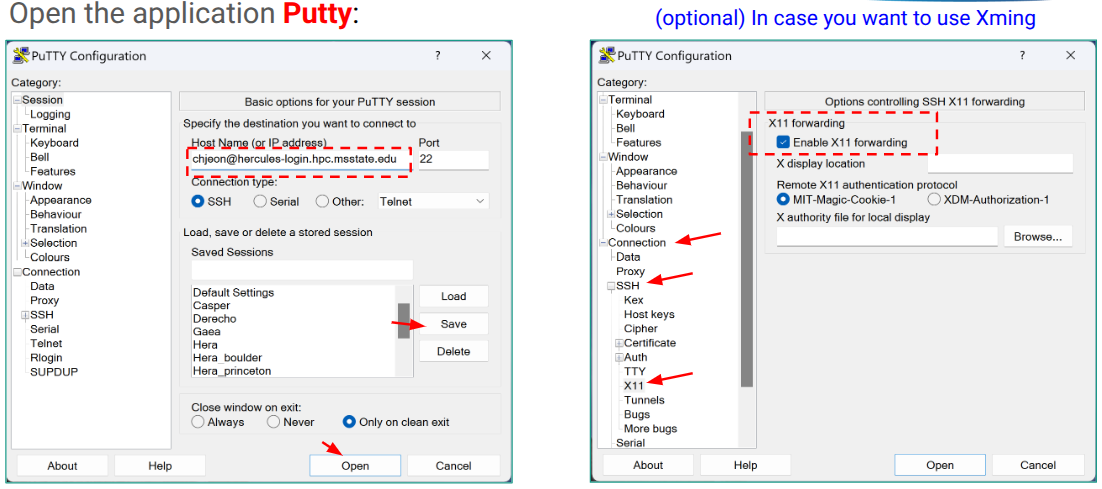
PuTTY settings for enabling X11 forwarding.
(Optional) Install Xming to provide the X11 display server:
Start Xming before launching PuTTY.
A.3 Basic Hercules HPC Environment
After logging in, verify your account and environment:
id
groups
showqos
pwd
Key items:
Username
Project allocation / Slurm QOS
Home directory
Work directory (e.g.,
/work/<project>/<username>)
A.4 Filesystem Overview
Hercules provides several storage locations:
Home directory — persistent, backed up
Work directory — high‑performance storage for experiments
Scratch — temporary, purged regularly
Check available space:
df -h
du -sh .
A.5 Slurm Usage Basics
Submit a batch job:
sbatch job.slurm
Request an interactive compute session:
salloc --qos=<qos> --time=01:00:00 --ntasks=1
Check queue status:
squeue
A.6 X11 Forwarding Notes
Test X11 forwarding:
xclock
If the clock window appears, X11 is working.
Troubleshooting:
macOS: ensure XQuartz is installed and running
Windows: ensure Xming is running before PuTTY
SSH must include
-XCheck
echo $DISPLAYis set
A.7 Summary
This appendix provides reference instructions for accessing Hercules from macOS and Windows, configuring X11 forwarding, and verifying your HPC environment. These steps support all CADRE Year‑2 training workflows.